Safe mode – Run safe mode – Windows
Run safe mode – Windows
Windows systems have been equipped with safe mode, allowing to run the system with a minimum number of programs and drivers. It is a very useful tool that can be used to fix important system problems, inappropriate drivers or malicious programs. Launching safe mode alone does not solve the problems, but gives the user the opportunity to find the problem and fix it before the next boot in normal mode. In Windows systems, safe mode could usually be started by pressing the F8 key during system startup. Windows 8 introduced a change in this matter and the following entry will present several ways to run safe mode.
Contents
Starting safe mode with the msconfig tool
In all versions of Windows (in Windows 2000 it must be downloaded separately), it is possible to use the system startup configuration tool – msconfig. With its help you can easily choose to boot into safe mode. Restoring normal boot involves having to change it again in msconfig.
The msconfig program can be started from the search in the start menu. From Windows Vista, just open the start menu and type “msconfig” and click on the found program in the list.
Then select the “Boot” tab, select “Safe boot” and the “Minimal” and “Apply” options.

From now on the system will boot in safe mode.
Starting safe mode from UEFI – Run safe mode – Windows
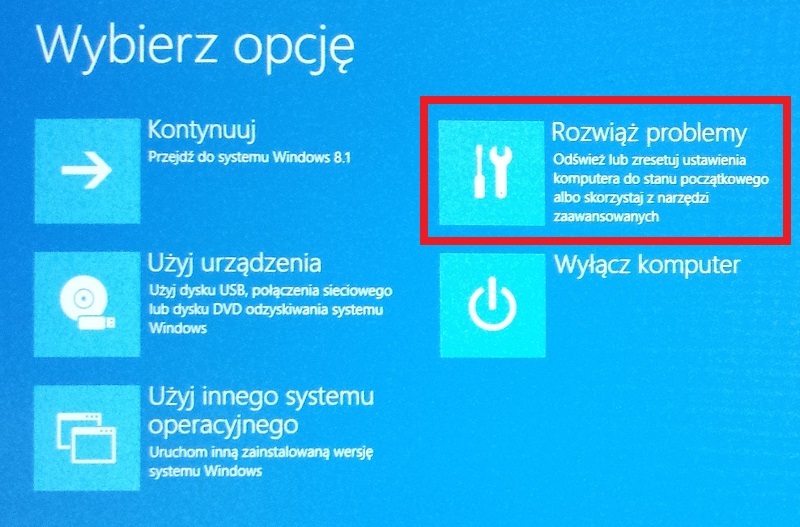
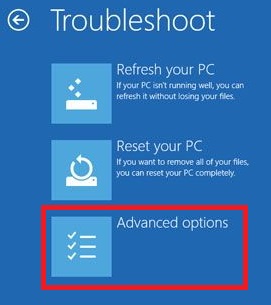
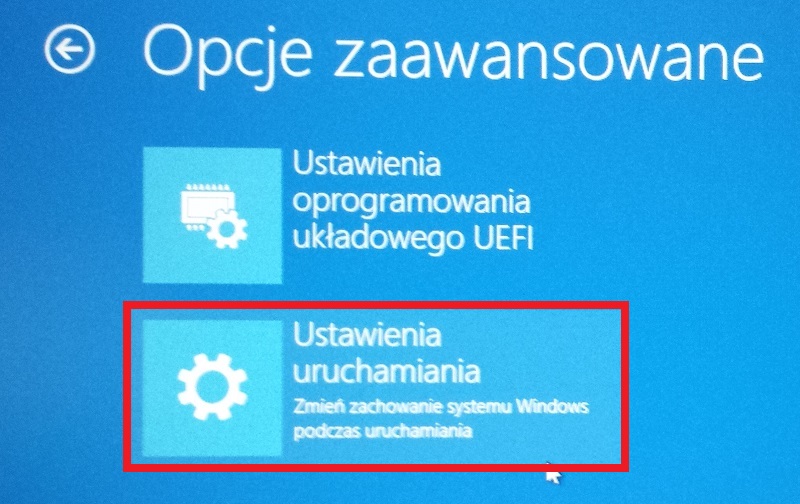
Starting safe mode from UEFI looks the same for Windows 8, 8.1 and 10. However, there are different ways to run the options available in UEFI. The order of elections in UEFI will be presented below, followed by the various options for launching it.
In the menu, select:
- Troubleshoot.
2. Advanced option
3. Startup Settings
4. Restart

5. In the next window there are 9 options for starting using the F1-F9 function keys. Safe mode is in the range F4-F6 (Enabling safe mode / with network support / with command line). Choose one of them.

This way you will enter safe mode. The following are various examples of how to run UEFI.
One-time launch of UEFI from the operating system level
To run UEFI once from a running Windows level, go to the system shutdown button, select “Restart” from the list and click holding down SHIFT. It is enough for UEFI to start up when it is restarted.
One-time launch of UEFI using the “Settings” option – Windows 8
Move the cursor to the right near the watch and select “Settings”, then “Change settings of this computer”


Then depending on the system:
– Windows 8 – Click General -> Advanced startup -> Restart (in the “Advanced startup” option).
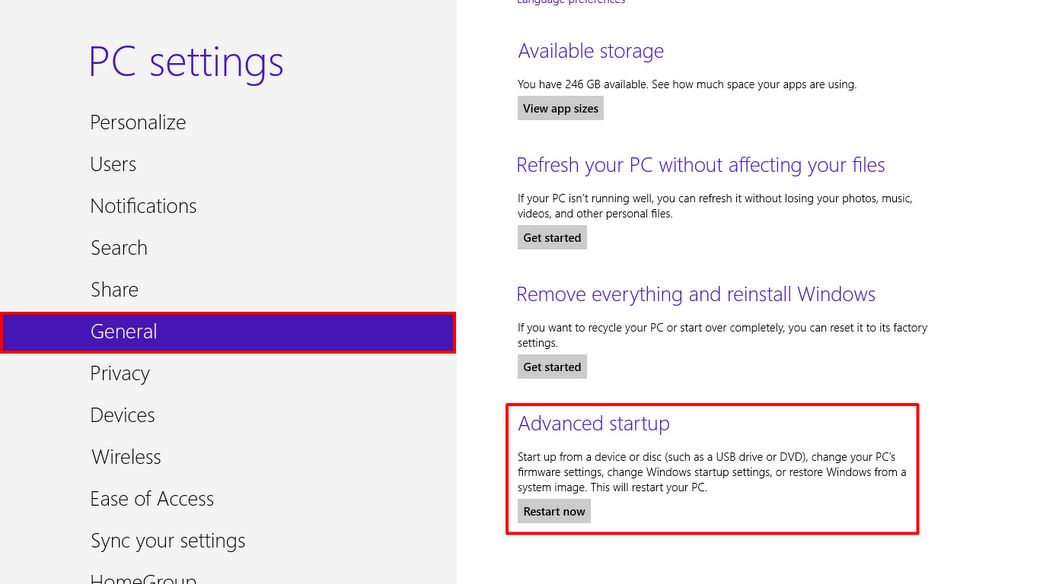
– Windows 8.1 – Click Updates and Recovery -> Recovery -> Run Now (in the “Advanced Startup” option).

The computer will restart and the UEFI menu will turn on.
One-time launch of UEFI using the “Settings” option – Windows 10
Select ‘Settings’ from the start menu, then ‘Updates and recovery’


In the opened menu select “Recovery” and “Run now” (in the “Advanced startup” option). The computer will restart with UEFI enabled.
Running UEFI on a damaged system
If the system cannot be started in Windows 8, the automatic repair environment will start. If this fails, then in the next window select the advanced options – it will launch the UEFI menu described earlier.
In Windows 10, after 2 failed attempts to load the system, the Windows RECOVERY environment will appear. Despite the different name of the first window, it has the same options as the UEFI menu discussed earlier.
Starting UEFI with the F8 key – Start safe mode – Windows
Some models may allow UEFI to be started by pressing the F8 key. However, it should be done much faster than in older computers, because startup time has been significantly reduced and it is easy to overlook the moment of pressing.

