Expanding your home network – a router as a repeater
Increase network coverage – configure the router as an access point

Expanding your home network – a router as a repeater.
In the event that the existing wireless network is not sufficient to reach all devices in the required location, it becomes necessary to increase the amount of wireless network transmission media. This can be solved by connecting more routers (entry on the example of a TP-LINK router). The router can be connected to the network by cable or wirelessly. Both methods are presented below as the next steps. The presented solutions allow to extend the range of one network, so that access to printers, network drives and other resources will not be disturbed.
Contents
Wired connection to the main router
Expanding your home network – a router as a repeater
The choice of this type of connection is the most optimal because it minimizes the losses resulting from the distance between routers.
Step 1
Route the cable from one of the LAN ports of the main router to one of the LAN ports of the router being mounted. The WAN port in this configuration will not be used.
Step 2
You need to configure the router, so you need to connect a computer to it. This is done by connecting to one of the free LAN ports and entering the device’s IP address in the browser. Usually it is 192.168.0.1 or 192.168.1.1, and the login and password is admin/admin. Of course, there may be other addresses, so look at the sticker on the bottom of the device. This can also be checked in the details of the network connection or on the CMD command line and entering the “ipconfig” command. For TP-LINK, you can use the address http://tplinklogin.net.
Step 3
After logging in, go to the Network -> LAN and set the address of the router being mounted to the address from the main router’s network range. In the example below, the main router has the address 192.168.1.1, and the mounted router has the address 192.168.1.111.

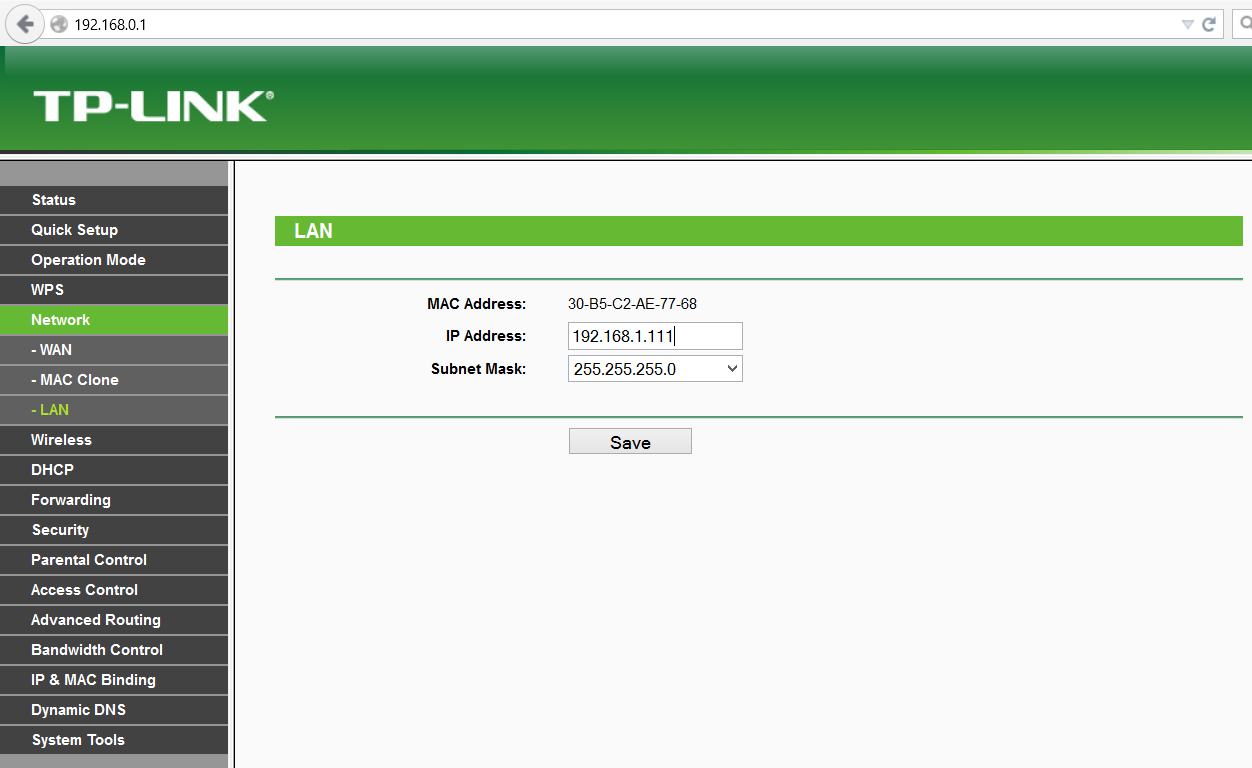
After changing the address, it is necessary to save and restart the router. This will be done automatically after clicking “Save” and “OK” in the displayed reset prompt. The browser will be redirected to the newly entered address.
Step 4
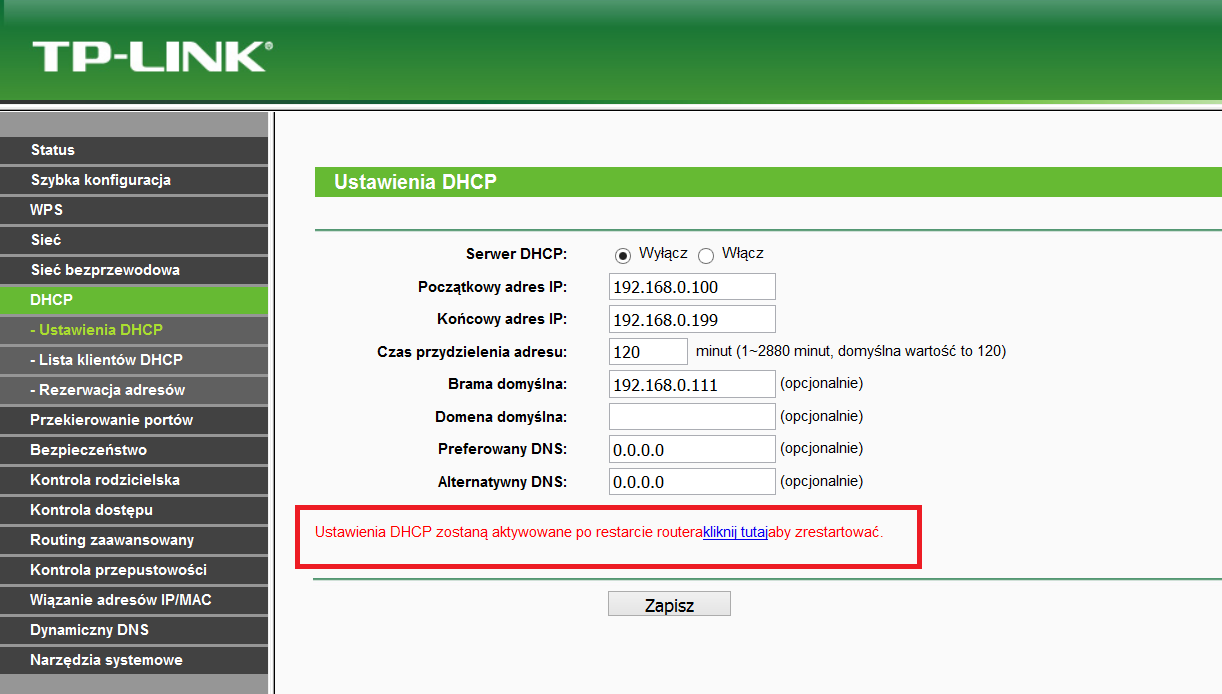
The next required configuration step is to disable DHCP management because this will be done by the main router. To do this, go to the DHCP -> DHCP Settings tab and in the first line disable the DHCP server. The change should be saved, after which information about the need to restart the router will be displayed and a link to the “Reset” tab will appear.

Step 5
The last step is optional and allows you to set the network name and password. If you skip this step, the name and password will match what is stated on the sticker at the bottom of the router.
The network name can be set in the Wireless -> Wireless Settings.
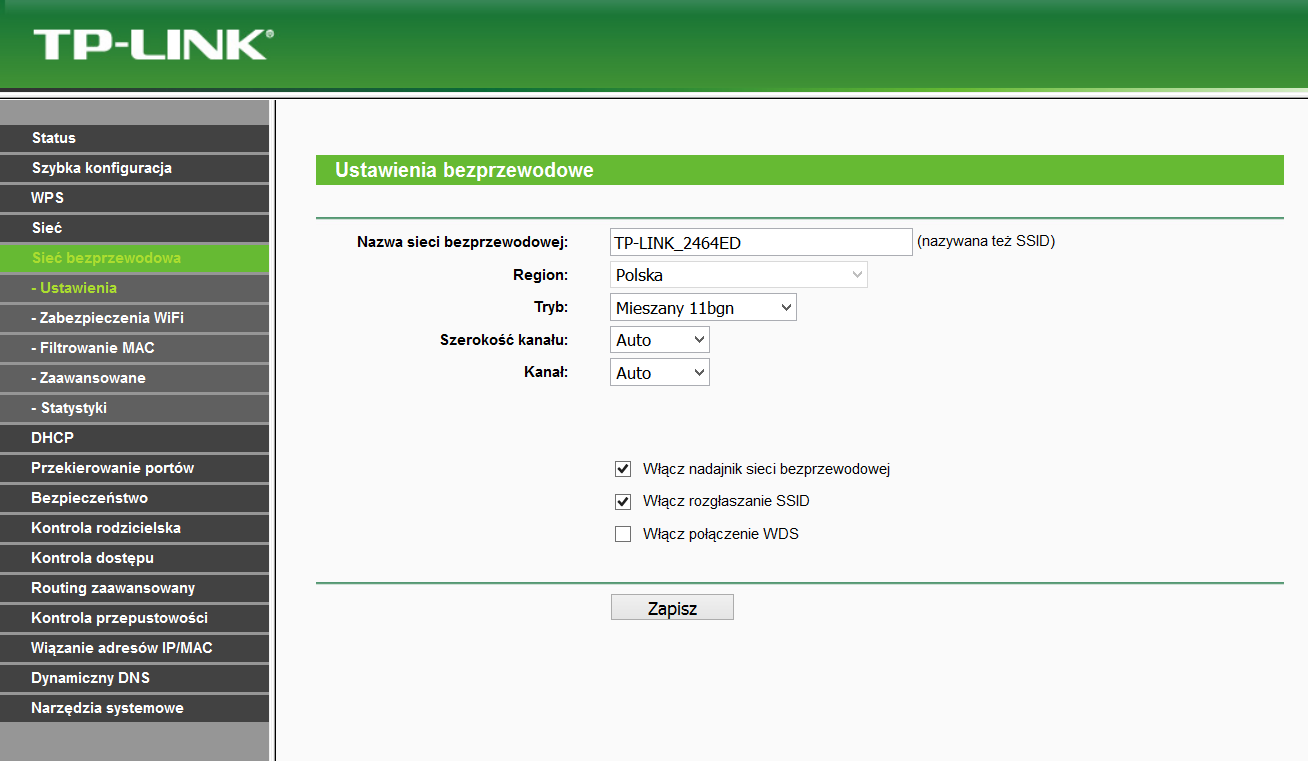
Whereas the type of security and password in the tab Wireless -> Wireless Security.
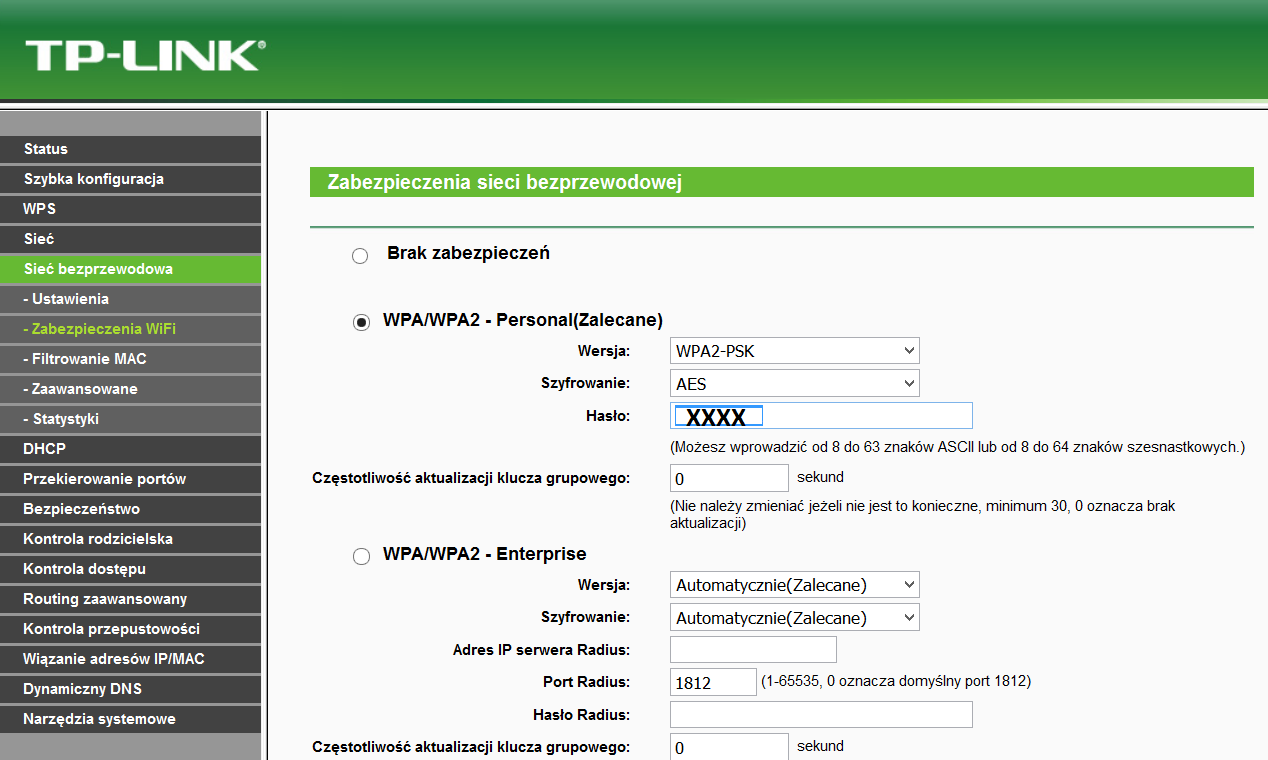
The presented steps are a complete configuration that allows you to extend the network.
Wireless connection to the main router
Router as a Repeater
This type of connection should be used when it is not possible to pull the wire between the main and exact router. It works in WiFi Repeater mode, forwarding received packets of messages. It is necessary to set the router properly. Find a place where the signal of the primary network is still quite good and where the transmitted signal will be visible to all remote devices. The configuration itself is very similar to the wired one, but due to minor differences, it will also be presented step by step.
Step 1
Connect the computer to the router through one of the free LAN ports, and then enter the device’s IP address in the browser. Usually it is 192.168.0.1 or 192.168.1.1, and the login and password is admin / admin. Of course, there may be other addresses, so look at the sticker on the bottom of the device. This can also be checked in the details of the network connection or on the CMD command line and entering the “ipconfig” command. For TP-LINK, you can use the address http://tplinklogin.net.
Step 2
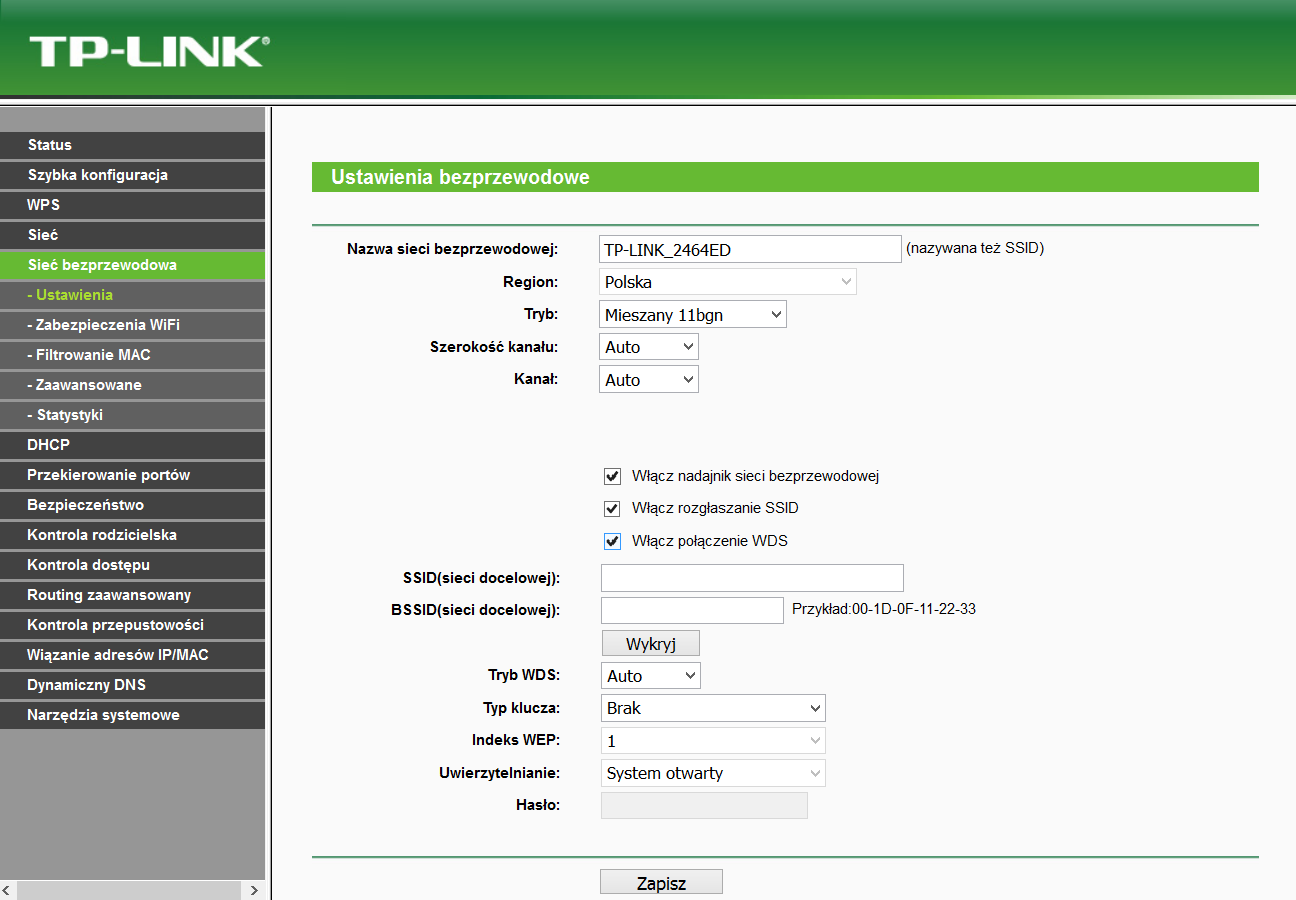
Because the location of the router is important for the quality of the new network segment, configuration can be started by finding the primary network and reading its signal strength. To do this, go to the Wireless -> Wireless Settings and enable the WDS connection option. This will display additional options allowing you to select the target wireless network.
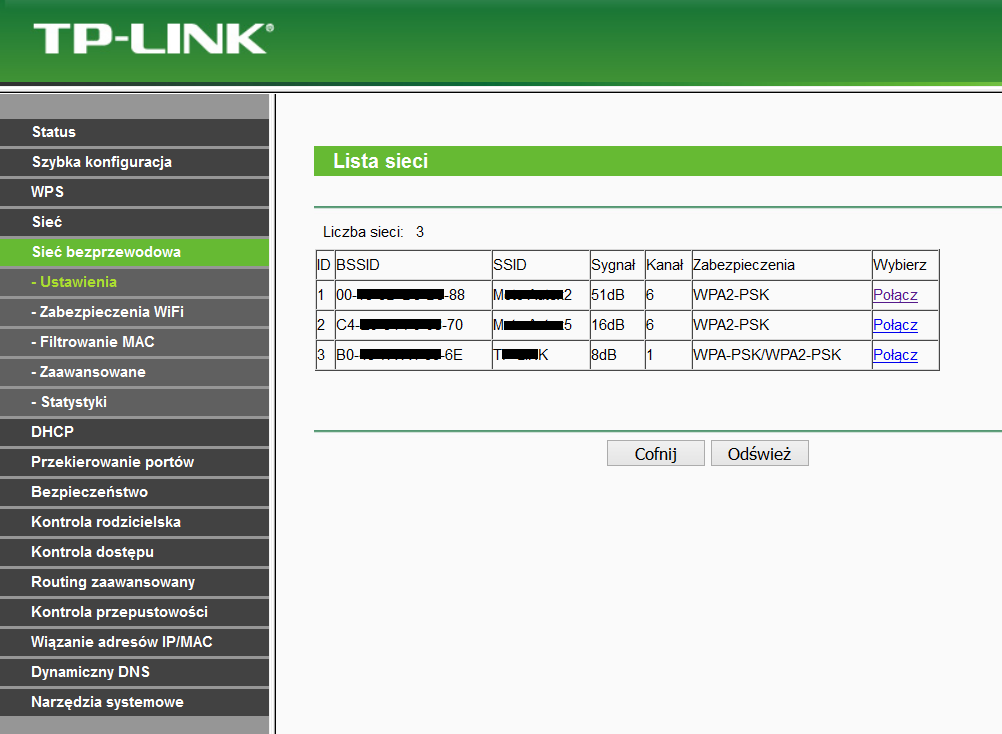
The “Detect” button will display all visible networks along with their signal strength.
After choosing one of the networks, enter the password for it:
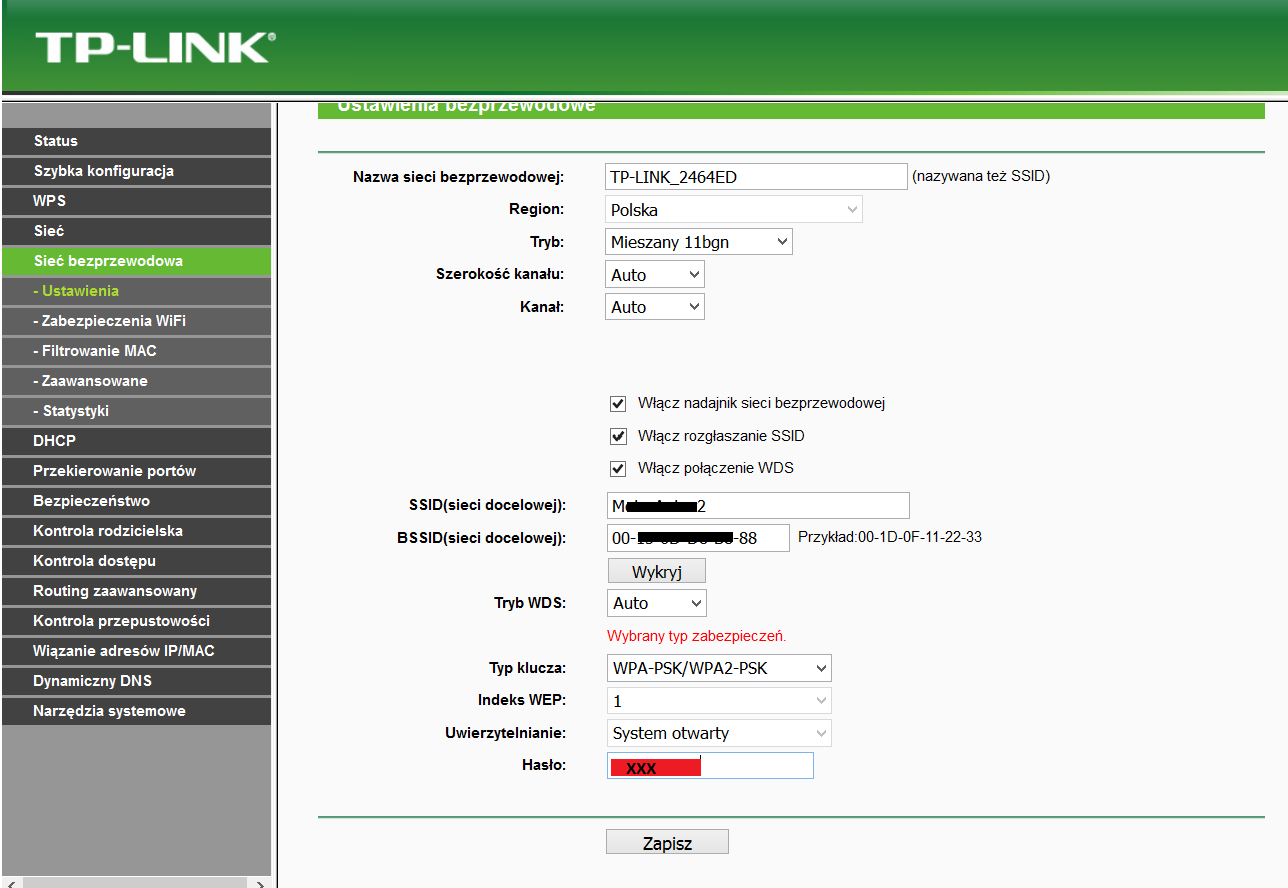
During saving, the router will take care of the correct channel setting and will set the appropriate channel itself if the operation is confirmed by pressing “OK”.

Step 3
Then go to the Network -> LAN and set the address of the mounted router to the address from the network range of the main router. In the example below, the main router has the address 192.168.1.1, and the mounted router has the address 192.168.1.111.


After changing the address, it is necessary to save and restart the router. This will be done automatically after clicking “Save” and “OK” in the displayed reset prompt. The browser will be redirected to the newly entered address.
Step 4
The next required configuration step is to disable DHCP management because this will be done by the main router. To do this, go to the DHCP -> DHCP Settings tab and in the first line disable the DHCP server. The change should be saved, after which information about the need to restart the router will be displayed and a link to the “Reset” tab will appear.


Step 5
The last step is optional and allows you to set the network name and password. If you skip this step, the name and password will match what is stated on the sticker at the bottom of the router.
The network name can be set in the Wireless -> Wireless Settings

Whereas the type of security and password in the tab Wireless -> Wireless Security

The presented steps are a complete configuration that allows you to extend the network without using cables.
Wireless connection – wizard configuration
Router as a Repeater
Some routers allow automatic configuration through a prepared connection wizard. It allows you to even simplify the steps outlined above. The following example shows a wireless connection to the main router.
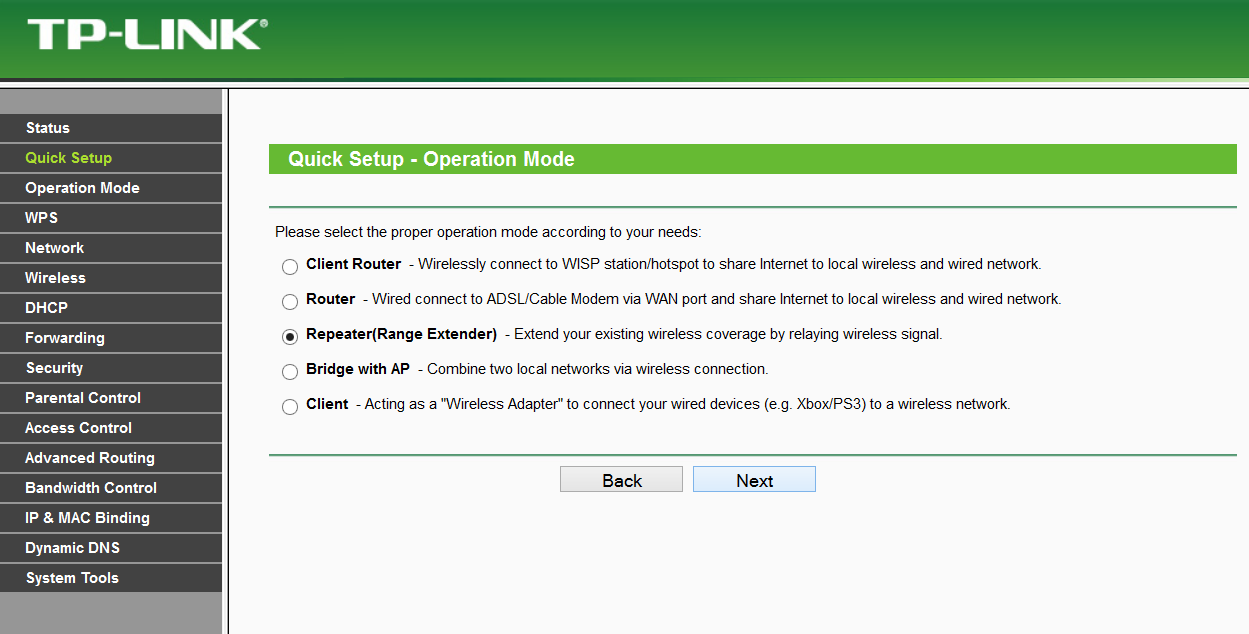
Step 1
Selecting the Quick Setup tab and then Repeater (Range Extender)
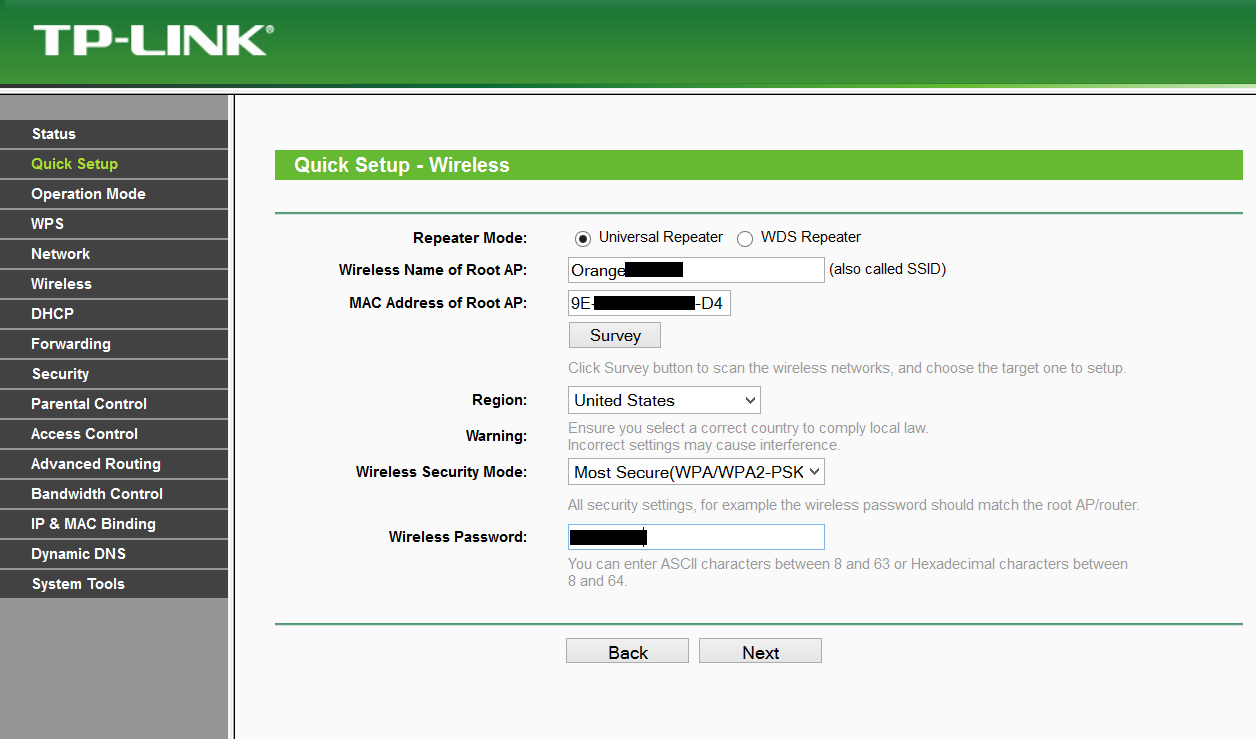
Step 2
The next step allows you to select the target wireless network and enter its password.
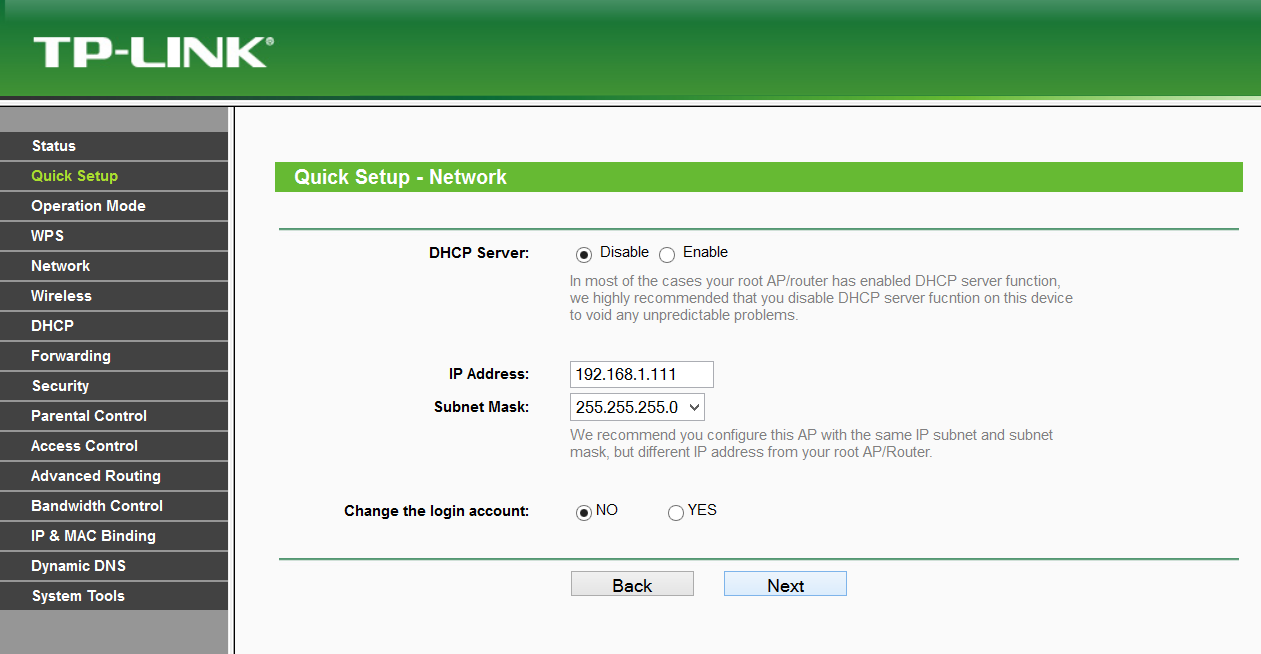
Step 3
The next stage allows you to disable the DHCP server and set the IP address of the router being mounted (it should be an address in the range of the target network).
Step 4
The last step displays a summary and allows you to save and restart the router.
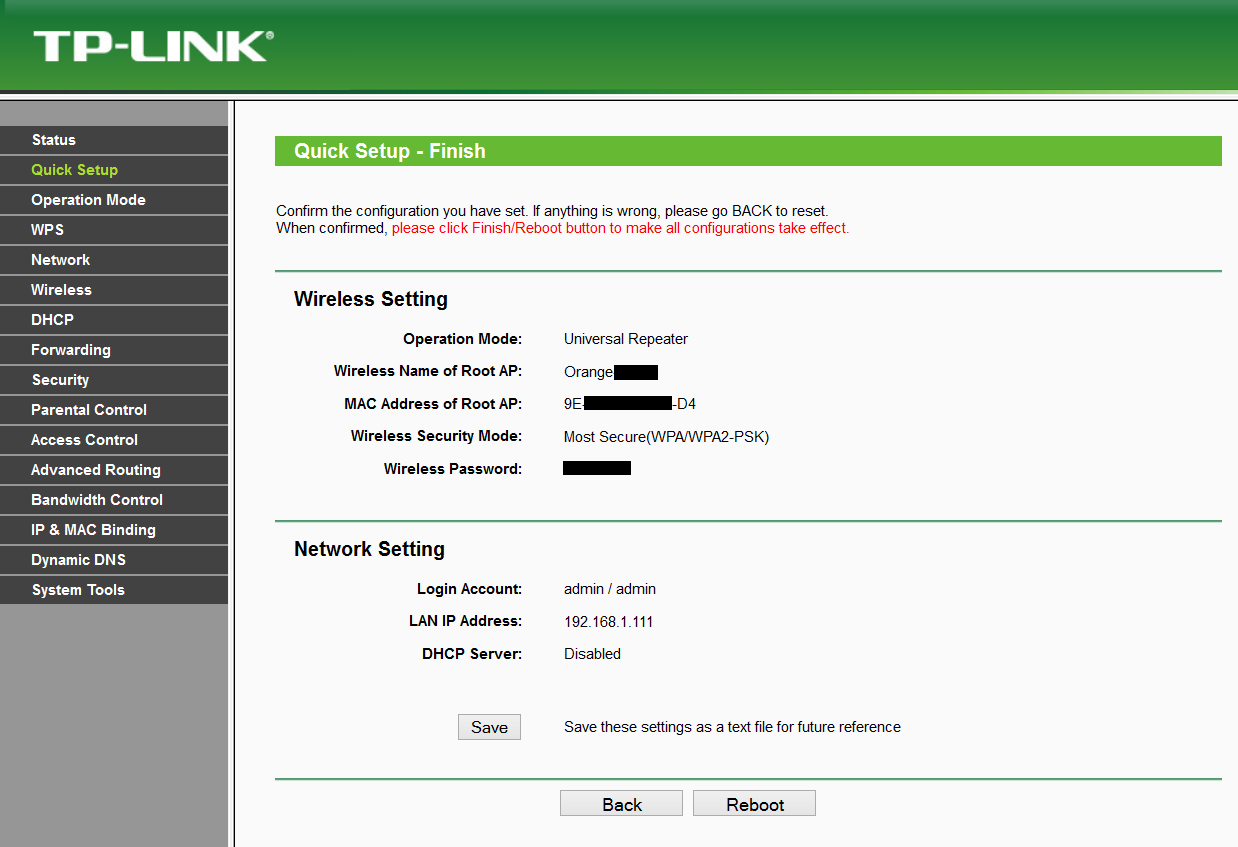
The wizard allowed you to configure the router with just a few mouse clicks. This is the easiest option and requires minimal knowledge, unfortunately it is not available in every router.

